
UV Decal Application
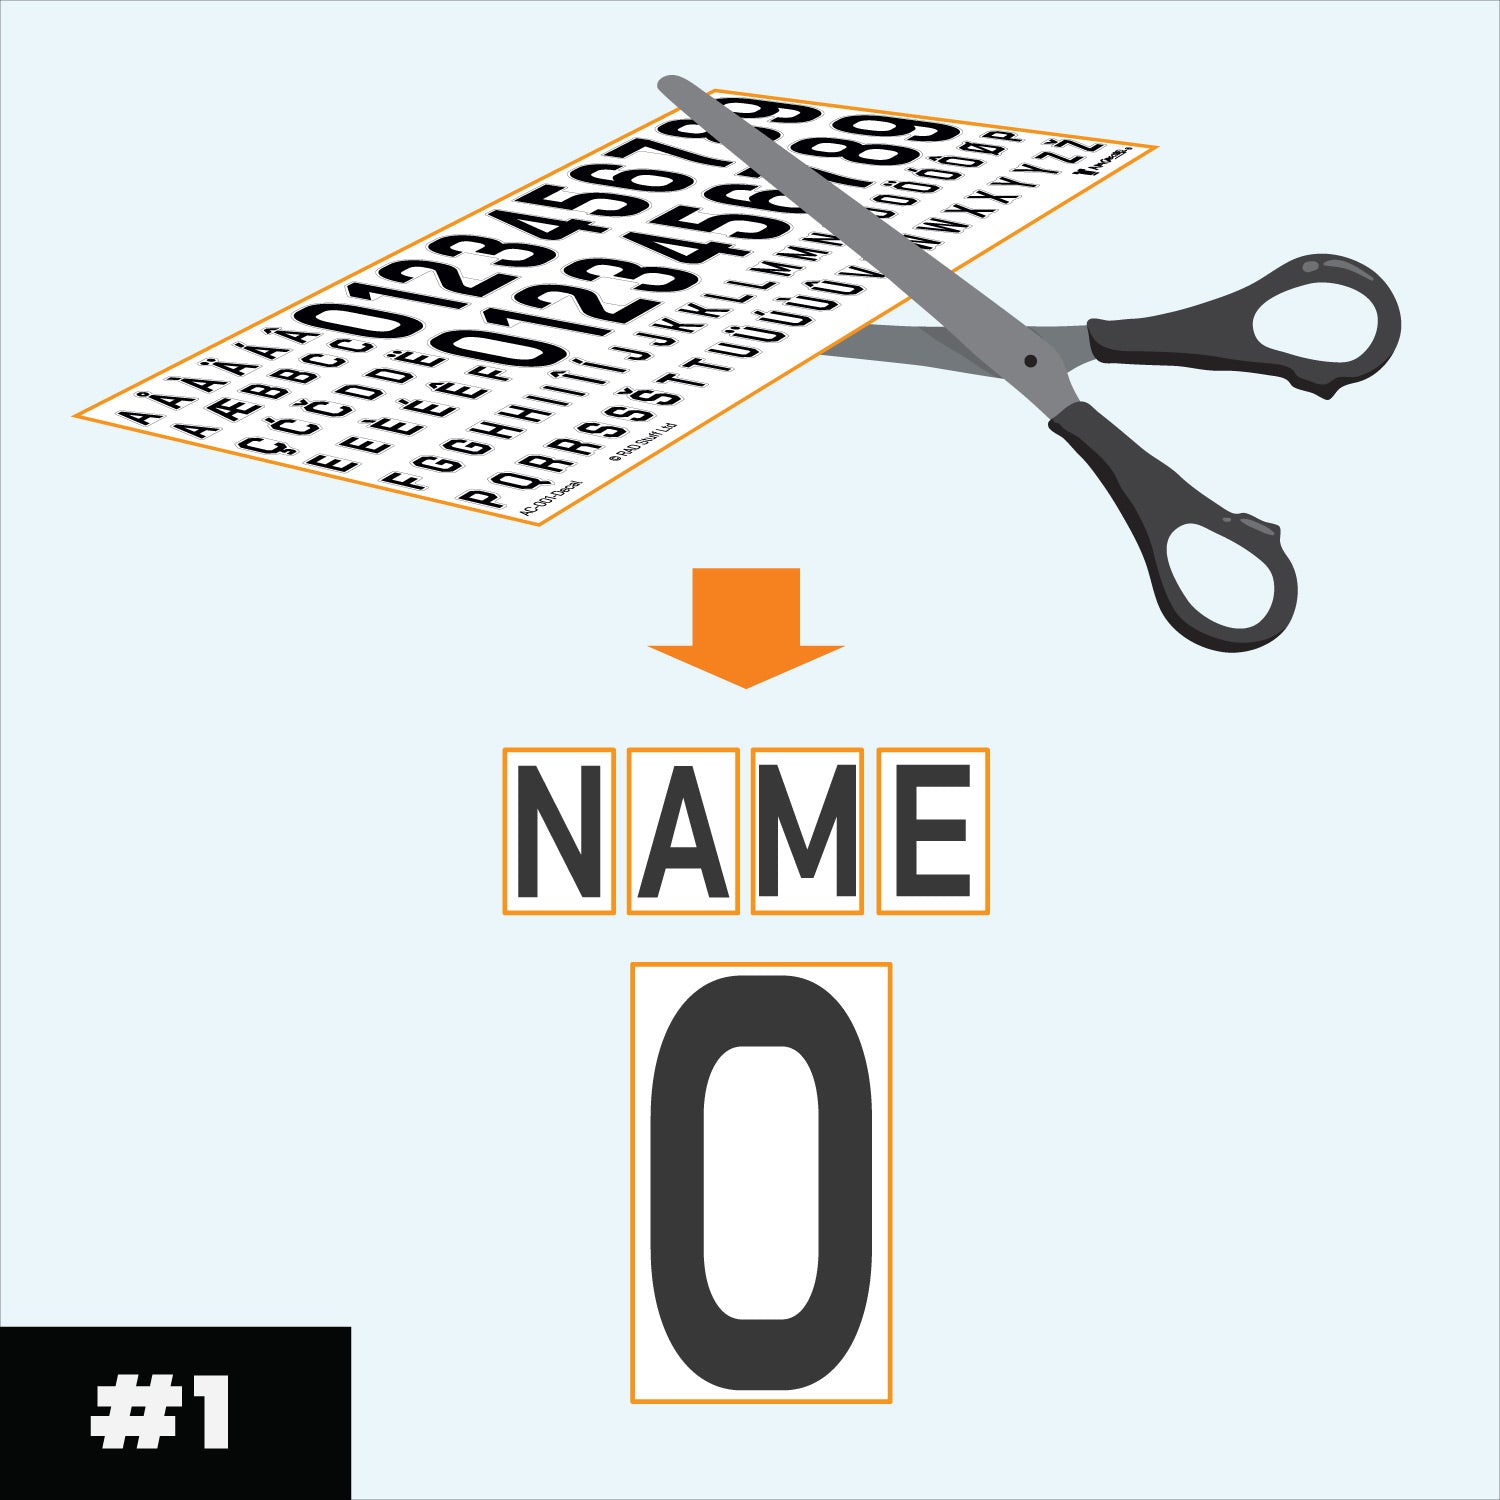
PICK YOUR LETTERS AND NUMBERS
After deciding what name to customise, and the letters and numbers you need, carefully cut around each letter/number leaving a small area around each.
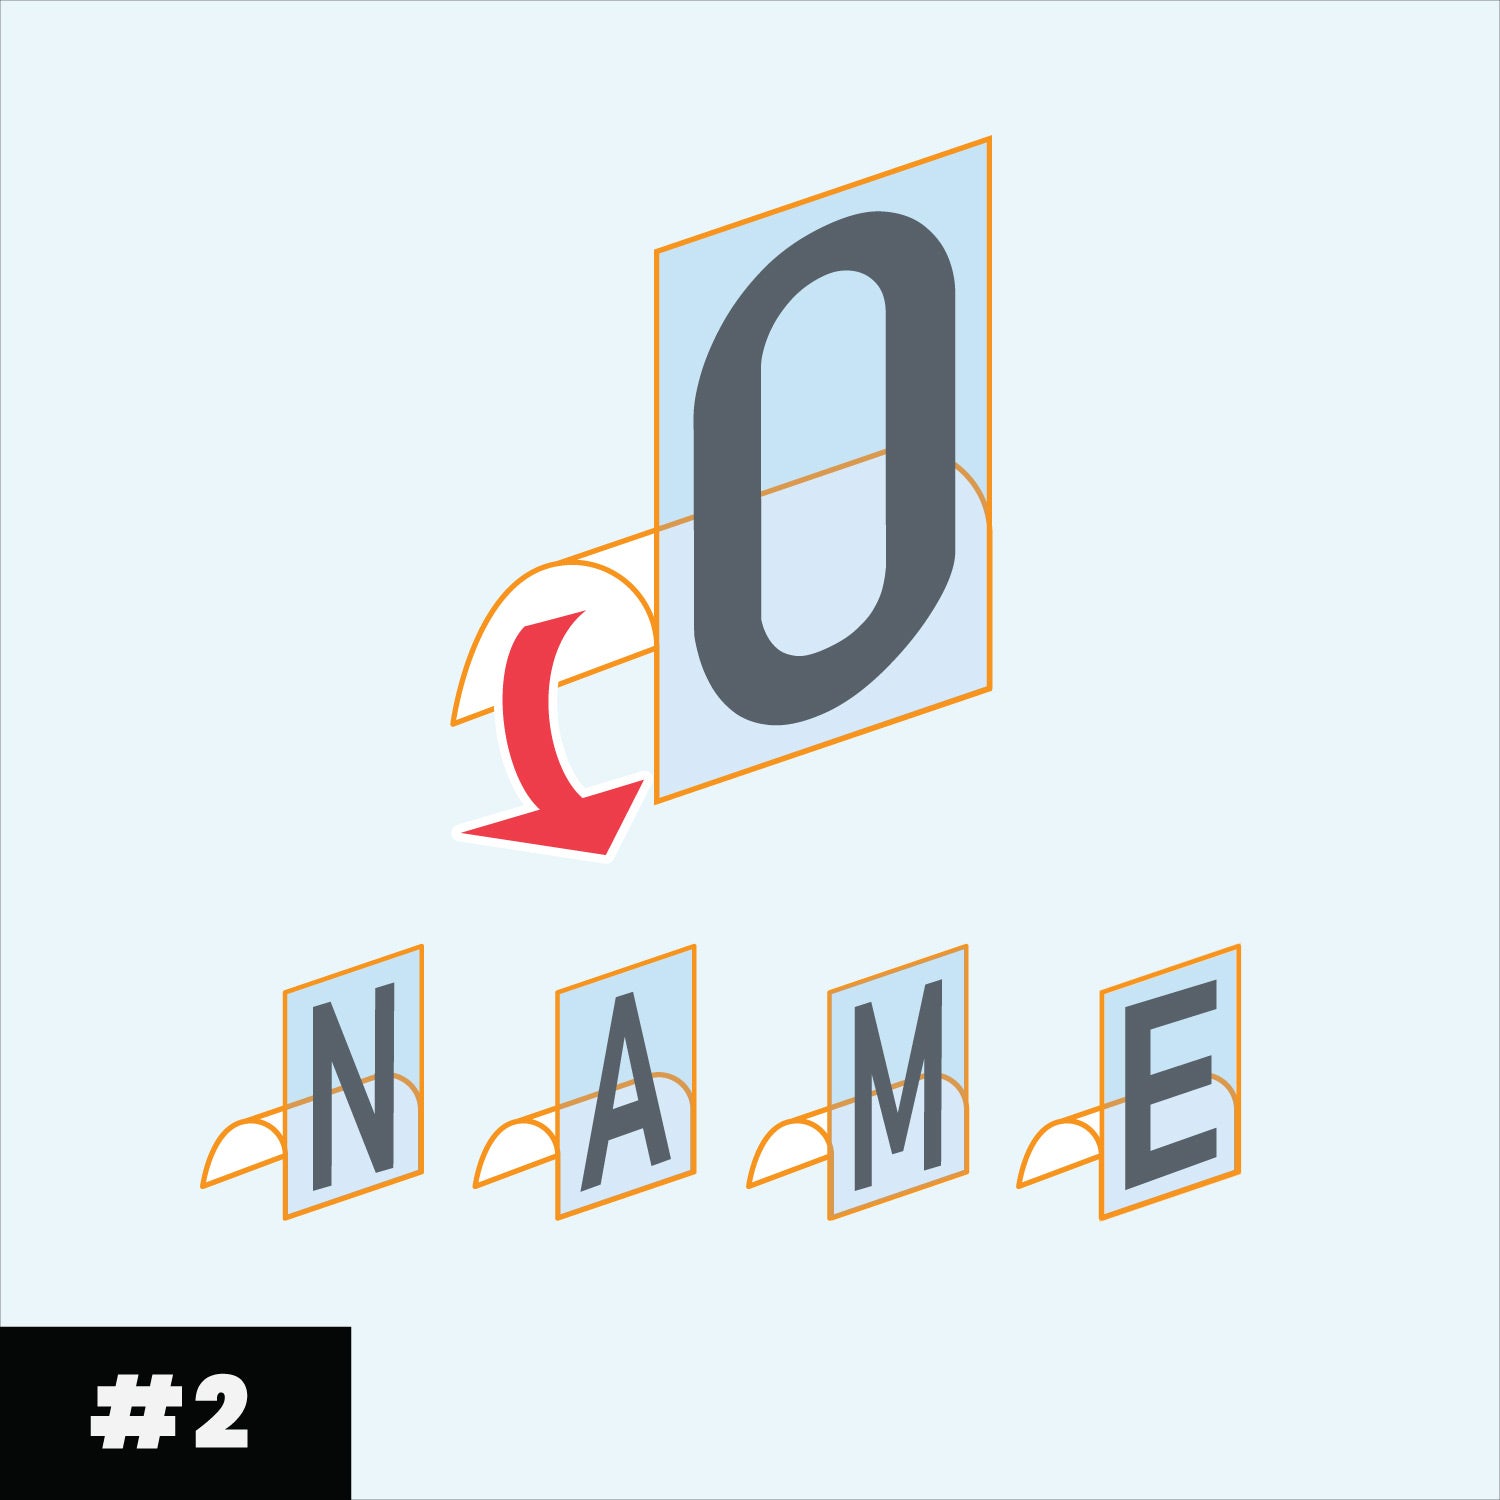
PREPARING THE STICKERS
Peel away the backing of the letter/number to expose the sticky adhesive, one letter at a time before, being careful not touch the adhesive.
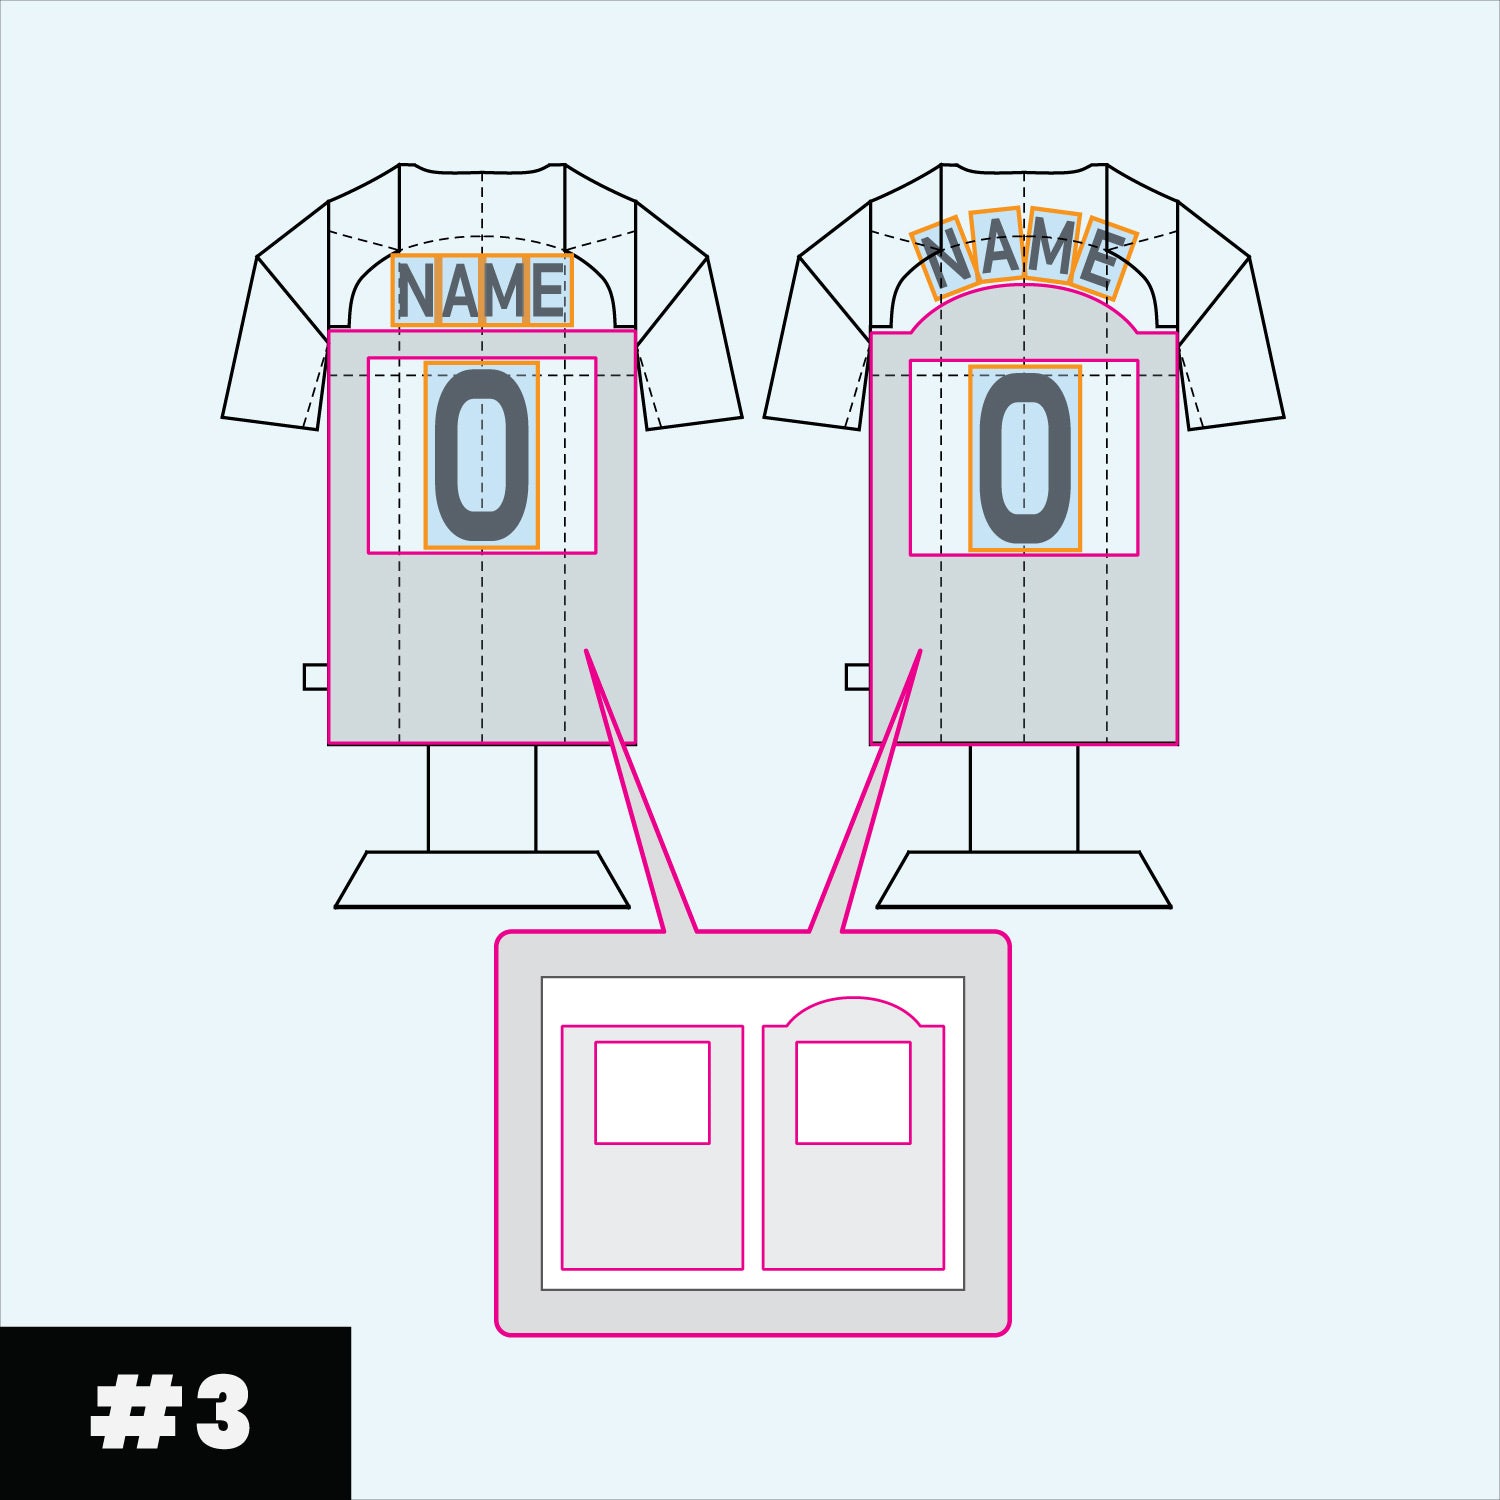
USE OUR GUIDES FOR ACCURATE ALIGNMENT
Decide how you want to arrange the name using one of the guides, applying one letter at a time. The guide can be stuck onto the jersey. Carefully align and press each letter/number onto the jersey.
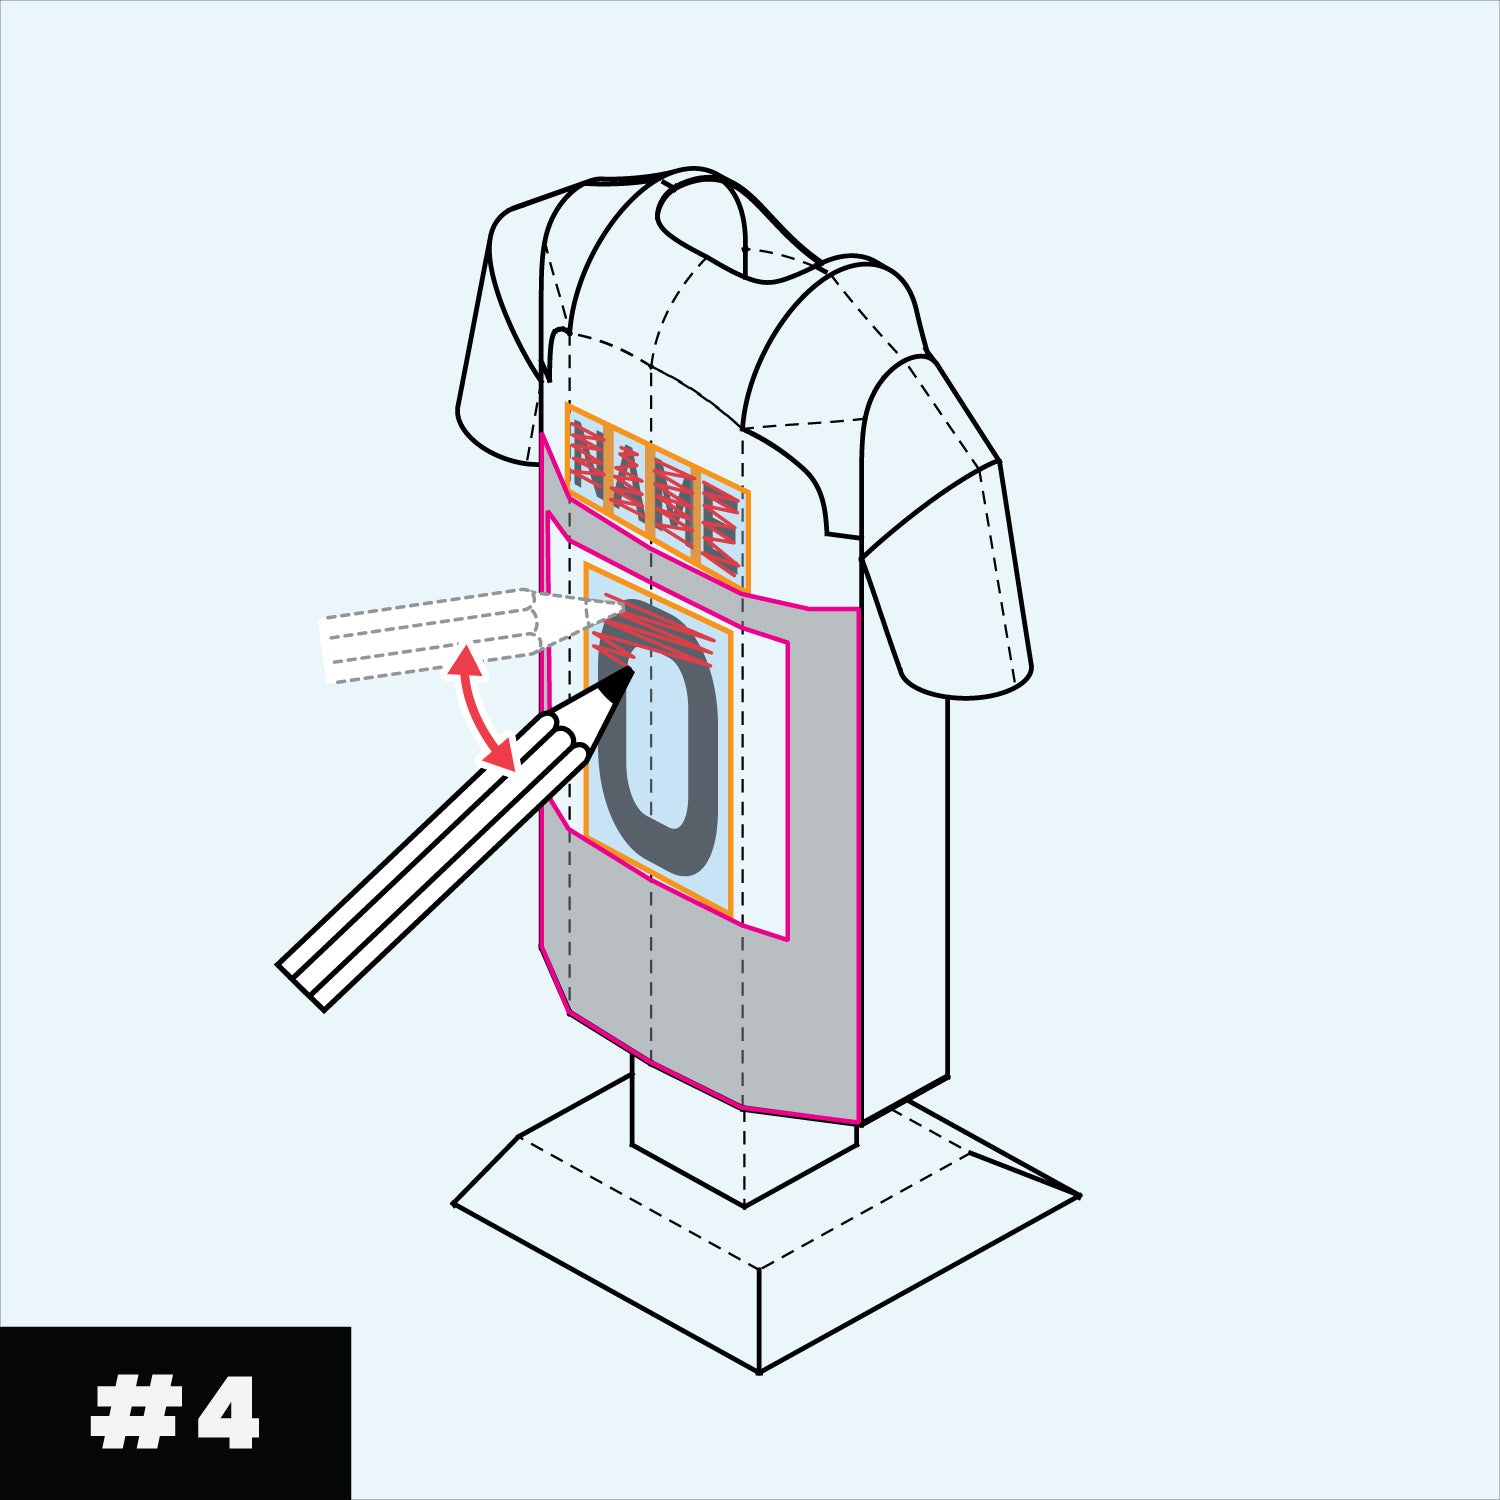
APPLICATION
Once in position, smooth each item using a pencil or your finger/fingernail/end of pencil to make sure they stick well. Pay attention to not press to hard that could damage the jersey.
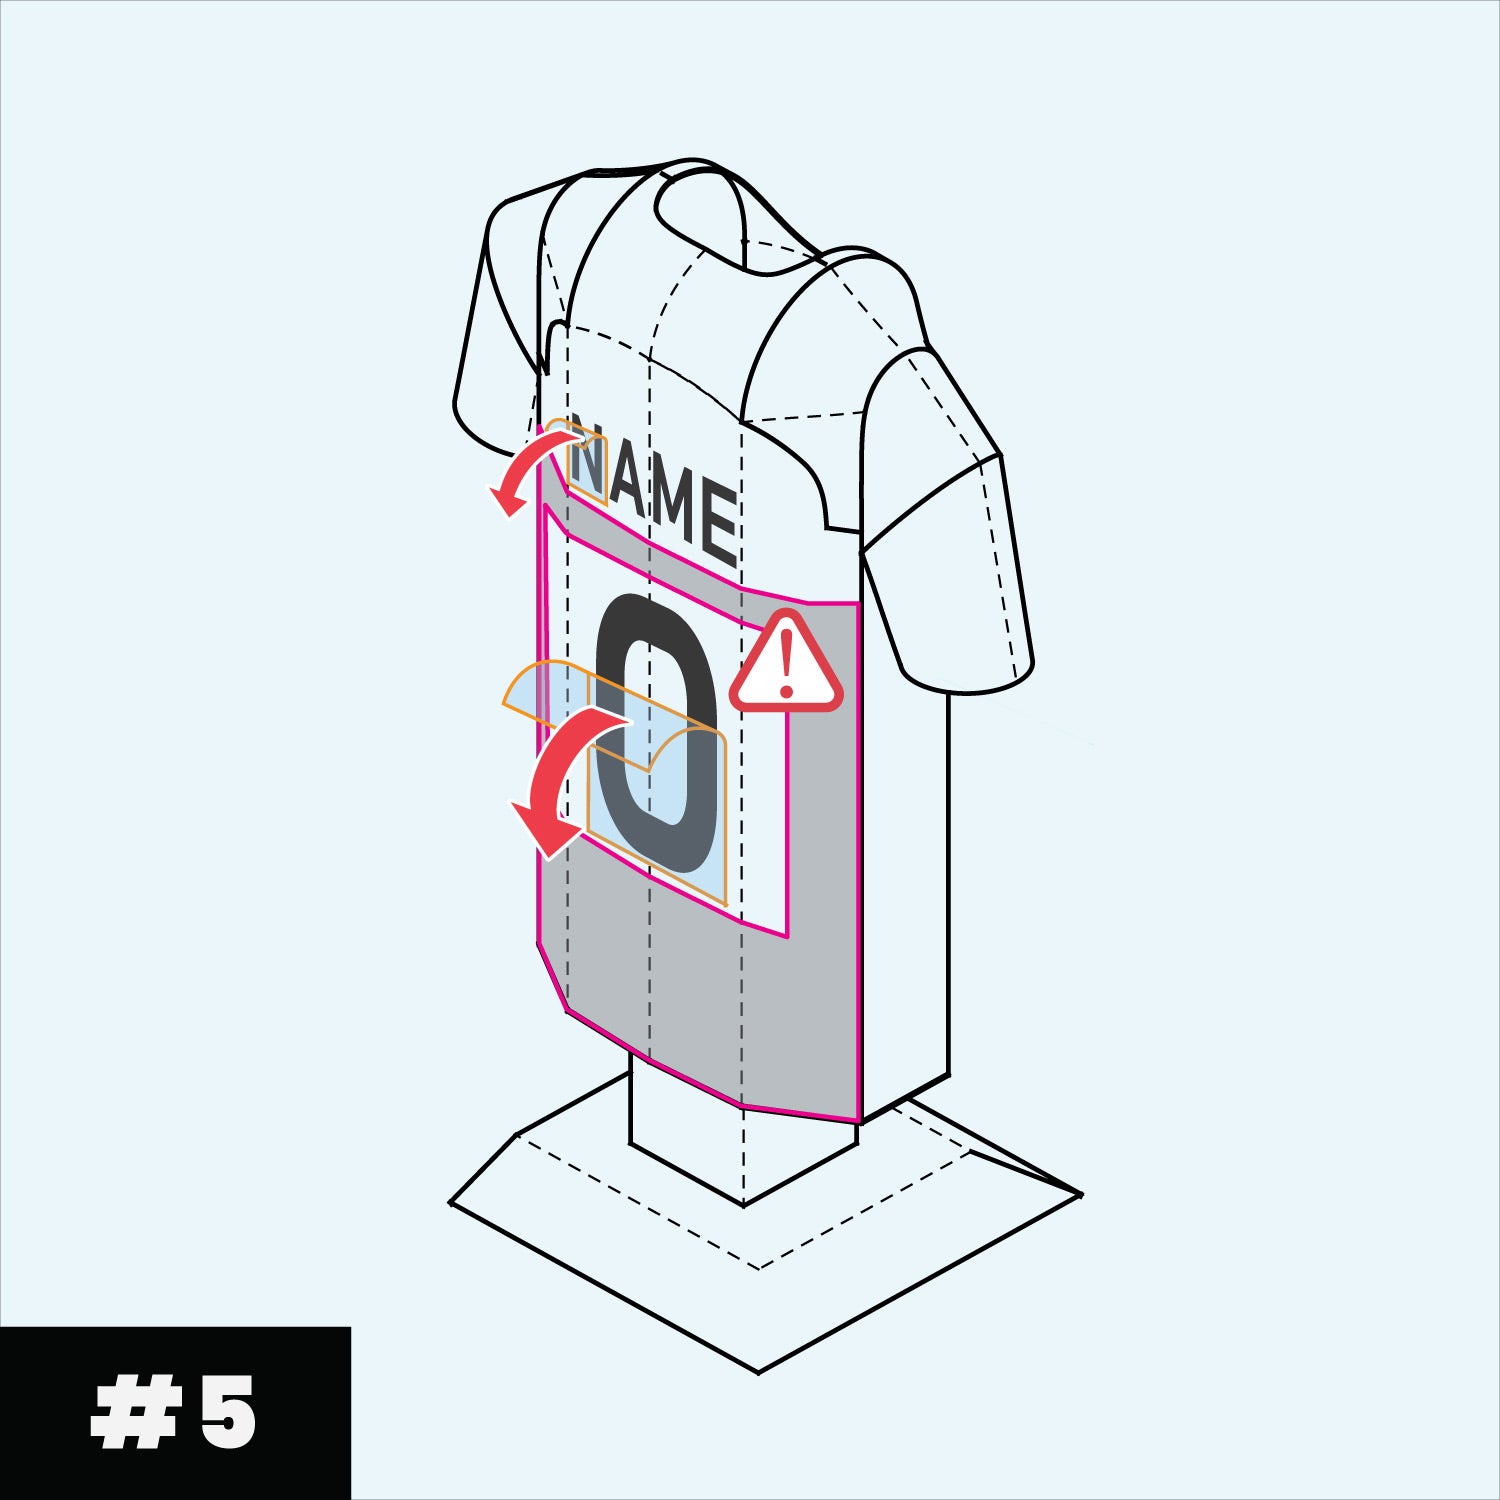
REMOVING THE FILM
Slowly peel away the backing making sure the letters and numbers stay stuck to the jersey. If you find a letter/number lifts slightly as you peel the top film, stop peeling and smooth the number/letter again before peeling again.
PICK YOUR LETTERS AND NUMBERS
After deciding what name to customise, and the letters and numbers you need, carefully cut around each letter/number leaving a small area around each.
PREPARING THE STICKERS
Peel away the backing of the letter/number to expose the sticky adhesive, one letter at a time before, being careful not touch the adhesive.
USE OUR GUIDES FOR ACCURATE ALIGNMENT
Decide how you want to arrange the name using one of the guides, applying one letter at a time. The guide can be stuck onto the jersey. Carefully align and press each letter/number onto the jersey.
APPLICATION
Once in position, smooth each item using a pencil or your finger/fingernail/end of pencil to make sure they stick well. Pay attention to not press to hard that could damage the jersey.
REMOVING THE FILM
Slowly peel away the backing making sure the letters and numbers stay stuck to the jersey. If you find a letter/number lifts slightly as you peel the top film, stop peeling and smooth the number/letter again before peeling again.